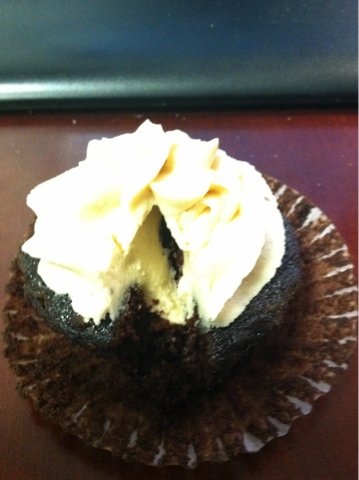
I am at that stage in my life where my life is baby showers :) My cousin threw the most adorable baby shower up in NY that was bee themed because the expectant parent's (her sister/my cousin and her husband) did not know what they were having; what would it bee? (It ended up beeing the most beautiful baby girl). I said I would make the cookies and bring them up to NY via the bus. I tried to plan ahead so I wouldn't be stressing out because October was a crazy month and I made the royal icing ahead of time......however, I messed it up because it seemed too stiff to me so I thinned it a little bit but once it got back to room temperature it was too thin!!! I ended up having all sorts of issues and the royal icing was too runny and I couldn't seem to be able to fix it. I ended up being a nut and the next day trimming the cookies so the icing wasn't all over the sides (I think this is about when I texted my best friend and told her I officially lost it). I also ended up using lemon flavoring instead of lemon extract and had to guess on how much I actually needed (I also walked down the hallway with the bowl of icing at like 10pm to havemy neighbor try it!) While they didn't come out perfect they still looked cute and tasted awesome, even better! I really have to get better on remembering to take good pictures but at least I got pictures of my cousin's totally cute beehive cupcakes. She really threw the most amazing shower, every detail was perfect!
Monday, December 17, 2012
What will it bee?
Labels:
Decorating,
Entertaining,
Sugar Cookies
Friday, December 14, 2012
Sweet and Salty!!
I feel like there are two types of people in this world: sweet or salty. I am definitely a sweet person.......taste preference not always in behavior :) When I started thinking about what I was going to make for the BaBy Q my mind kept wandering back to a great recipe I saw on Bee in Our Bonnet and I decided that this was going to be the time to make these caramel and chocolate covered pretzels. Since I tend to be forgetful and overthink things (such a great combo) I couldn't remember what blog I saw the recipe at and so I started doing google searches and honestly the Bee in Our Bonnet recipe was the easiest and the best one so I am glad I finally found it again. These were a HUGE hit and someone told me they tasted like a Twix - to me like a sality twix. They do take some time to make.
I used the Kraft Caramel squares and it worked out well; Bee in Our Bonet also suggested the caramel bits but I couldn't find them. I followed her directions with melting the caramel in a pyrex and using the edge to scrape off a lot of the caramel. I rested then ona cookie rack but then it got the lineson them so then I hand rolled all of them. However, they got the lines again with the chocolate but when I put the decorative chocolate on it I tried to cover the lines up. I was pretty lucky and my bag was pretty good and didn't have a lot of broken rods but I did break some when I was doing it so maybe have a second bag just in case. The original recipe said she got around 30 ish.
CARAMEL & CHOCOLATE COVERED PREZTELS
(Source: Bee in Our Bonnet)
INGREDIENTS:
1 bag of caramel squares - it is about 2 cups
2 tsp water
1 bag of chocolate
Something to decorate - colored chocolate, nuts, sprinkles
Directions:
- Melt 2 cups of unwraped caramels with 2 tsp water in a pyrex measuring cup in the microwave for 1 minute then stir and then add another 30 seconds.
- Angle the Pyrex and using the lip take some of the caramel off.
- After you let them dry a little bit melt the chocolate in the mircowave and then it can be helpful to use a Pyrex or taller. I can not remember but I might have done the chocolate in batches.
- Depending how you want to decorate either let the chocolate dry and then use the decorative chocolate or let it still be a little wet to dip it in the nuts etc.
-You can use a tall glass to disapply or just eat right away!!
I used the Kraft Caramel squares and it worked out well; Bee in Our Bonet also suggested the caramel bits but I couldn't find them. I followed her directions with melting the caramel in a pyrex and using the edge to scrape off a lot of the caramel. I rested then ona cookie rack but then it got the lineson them so then I hand rolled all of them. However, they got the lines again with the chocolate but when I put the decorative chocolate on it I tried to cover the lines up. I was pretty lucky and my bag was pretty good and didn't have a lot of broken rods but I did break some when I was doing it so maybe have a second bag just in case. The original recipe said she got around 30 ish.
I used approximately 2 cups of these and threw in 2 tsp. of water. I microwaved it for 1 minute, then stirred, then microwaved it for 30 seconds more. Your times may vary a little but this worked for me.
A 2 cup pyrex measuring cup is perfect to use. It doesn't even have to be totally full. If you tip it on it's side and roll the pretzel, you can get about 30ish pretzel rods out of it. I bought plenty of extra pretzel rods because about 1/4 of the bag was always broken.
CARAMEL & CHOCOLATE COVERED PREZTELS
(Source: Bee in Our Bonnet)
INGREDIENTS:
1 bag of caramel squares - it is about 2 cups
2 tsp water
1 bag of chocolate
Something to decorate - colored chocolate, nuts, sprinkles
Directions:
- Melt 2 cups of unwraped caramels with 2 tsp water in a pyrex measuring cup in the microwave for 1 minute then stir and then add another 30 seconds.
- Angle the Pyrex and using the lip take some of the caramel off.
- After you let them dry a little bit melt the chocolate in the mircowave and then it can be helpful to use a Pyrex or taller. I can not remember but I might have done the chocolate in batches.
- Depending how you want to decorate either let the chocolate dry and then use the decorative chocolate or let it still be a little wet to dip it in the nuts etc.
-You can use a tall glass to disapply or just eat right away!!
Tuesday, October 30, 2012
BaBy Q Sugar Cookies!
For the BaBy Q I made cookies for the girls as favors and minis for the party...............the minis got devoured even by the boys. I have to say I was really happy and proud of these cookies. I think it was because I planned and took my time but everything seemed to go well. I used my Sugar Cookie Recipe and Pink Martini and Pearls royal icing recipes that I have used before on the Bow cookies - this time I ended up making 3x times her recipe (2 times early on in the night and one later on).
THE BEST ROLLED SUGAR COOKIES:(Source: All Recipes)
INGREDIENTS:
1 1/2 cups butter, softened
2
cups white sugar
4
eggs
1 teaspoon vanilla extract
5
cups all-purpose flour
2
teaspoons baking powder
1 teaspoon salt
DIRECTIONS:
- In a large bowl, cream together butter and sugar until smooth. Beat in eggs and vanilla. Stir in the flour, baking powder, and salt. Cover, and chill dough for at least one hour (or overnight).
- Preheat oven to 400 degrees F (200 degrees C). Roll out dough on floured surface 1/4 to 1/2 inch thick. Cut into shapes with any cookie cutter. Place cookies 1 inch apart on ungreased cookie sheets.
- Bake 6 to 8 minutes in preheated oven. Cool completely.
ROYAL ICING:
(Source: Pink Maritinis and Pearls)
INGREDIENTS: Times is by at least 2 - probably 3 times
1 lb. Powdered Sugar (does not need to be sifted)
3 Tbl. Meringue Powder
6 Tbl. Hot Water (from tap is fine)
1-2 Tablespoon of Lemon Extract (this is an addition by me but do it to taste)
DIRECTIONS:
- With a whisk attachment beat all the ingredients on high until fluffy. Do not under beat. Pink Martini mixes for at least 8 minutes. Put the icing immediately in a container with a tight lid to prevent it from drying out.
I then followed her directions for 10 second icing:
Labels:
Decorating,
Holiday,
Icing,
Sugar Cookies
BaBy Q!!!!
I think I am at that age where I no longer go to weddings but now I go to baby showers. I am also the type of person that offers to throw baby showers.................o why! I ended up helping throw a baby shower for my neighbors but we did it with a twist and threw a coed BaBy Q shower and had some awesome BBQ catered; of course, I did the desserts. I am trying to get better about planning and because I am crazy and planned a last minute trip to Spain leaving the next day (you can check that out on my travel blog: Runaway Cubicle) I spread things out over multiple days and it totally made a difference - even though I was still up crazy late decorating cookies. Since it was a co-ed baby shower we didn't really want to do games but we did do one. I bought baby bottles and we did a beer race with 2 rounds (dads vs non dads) and the winner of each round went head to head. I do not have kids and bought the slow flow ones (um I am clueless) so we decided to puncture them and make them a little bit bigger.............yeah it wasn't a smart idea because it wasn't really a challenge so if you do it then don't make it bigger!
Bottles are solid chocolate
The Boys Baby Shower Gift was a choice of different flavored Hot Sauces
They were labeled
Brubeck Temper Tantrum Sauce
Labels:
Chocolate,
Cupcakes,
Entertaining,
Holiday,
Red Velvet
Monday, September 24, 2012
Berry Heaven!
I so need a break from sugar cookies!!! If you cannot tell they are my albatrose but I am so stubborn that I have decided I am going to conquer them. My first non-sugar cookies recipe was going to be something for my mom's birthday. When I asked her what she wanted she said no chocolate and really no cake, is she trying to kill me!!! Plus this also had to be able to survive a car trip from DC to NY (O 95 how I love thee). My mom loves pie (she originally suggested my berry bars) and my coworker told me about this pie recipe that was delicious and really it is a huge winner, not only because it is so easy (especially when you used a frozen pie crust) but it is delicious. It was a little tart but mom loved it that way!
The recipe calls for 5 cups of fresh blueberries. I used 2 of the big containers of blueberries, which I think is actually 4 cups and it was perfect! A second time I made it I threw in 2 1/2 containers (guess the blueberries were smaller). When my coworker and I walked to the supermarket around the corner from work she said she made a pie crust from scratch........I am lazy and time crunched lately so I used a deep dish frozen pie crust and that worked perfectly! I know the pureists out there probably hate that but hey you gotta do what you gotta do :)
BLUEBERRY CRUMB PIE
(Source: Sweet Kat's Kitchen)
INGREDIENTS:
1 9-inch unbaked pie crust
FILLING:
3/4 c. granulated sugar
1/3 C. All- Purpose Flour
1 T. Cornstarch
1/2 tsp. Ground Cinnamon
1 T. Lemon Juice
5 C Fresh Blueberries (2 containers can work depending on the size of the blueberries)
TOPPING:
2/3 C. Packed Light Brown Sugar
3/4 C. Quick Cooking Oats
1/2 C. All purpose flour
1 tsp. Ground Cinnamon
1/4 Tsp. Ground Nutmeg
6 T. Butter, melted
DIRECTIONS:
- Preheat over to 375 degrees F. Press pie crust into 9 inch pie plate
- In a large bowl, stire together the sugar, flour, cornstarch, and cinnamon. Mix in blueberries. Add lemon juice and fold gently to combine. Pour into pie crust.
- Topping: In a medium bowl, stir together the brown sugar, oats, flour, cinnamon, and nutmeg. Mix in melted butter with fork or hands ntil crumbly.
- Spread evenly over the pie filling.
- Bake for 60 minutes or until top is browned.
- HARD PART: cool completely on a wire rack.
The recipe calls for 5 cups of fresh blueberries. I used 2 of the big containers of blueberries, which I think is actually 4 cups and it was perfect! A second time I made it I threw in 2 1/2 containers (guess the blueberries were smaller). When my coworker and I walked to the supermarket around the corner from work she said she made a pie crust from scratch........I am lazy and time crunched lately so I used a deep dish frozen pie crust and that worked perfectly! I know the pureists out there probably hate that but hey you gotta do what you gotta do :)
BLUEBERRY CRUMB PIE
(Source: Sweet Kat's Kitchen)
INGREDIENTS:
1 9-inch unbaked pie crust
FILLING:
3/4 c. granulated sugar
1/3 C. All- Purpose Flour
1 T. Cornstarch
1/2 tsp. Ground Cinnamon
1 T. Lemon Juice
5 C Fresh Blueberries (2 containers can work depending on the size of the blueberries)
TOPPING:
2/3 C. Packed Light Brown Sugar
3/4 C. Quick Cooking Oats
1/2 C. All purpose flour
1 tsp. Ground Cinnamon
1/4 Tsp. Ground Nutmeg
6 T. Butter, melted
DIRECTIONS:
- Preheat over to 375 degrees F. Press pie crust into 9 inch pie plate
- In a large bowl, stire together the sugar, flour, cornstarch, and cinnamon. Mix in blueberries. Add lemon juice and fold gently to combine. Pour into pie crust.
- Topping: In a medium bowl, stir together the brown sugar, oats, flour, cinnamon, and nutmeg. Mix in melted butter with fork or hands ntil crumbly.
- Spread evenly over the pie filling.
- Bake for 60 minutes or until top is browned.
- HARD PART: cool completely on a wire rack.
Friday, September 21, 2012
Pink Cookie Love!
When I made the adorable bowties and neckties for Father's Day I decided to make some cookies for my mom's birthday as well. I made some cute birthday cupcake cookies that had a candle on top; however, the candle part could be flimsy and didn't come out right sometimes so I just cut that part of and just had a cupcake cookie. I also made some present cookies, those need some work to look cute! Also, I made some mini hearts and sunglasses for her pool! These were all made with Pink Martini and Pearls and my Sugar Cookie Recipe.
Labels:
Cookies,
Decorating,
Holiday,
Icing,
Series,
Sugar Cookies
Thursday, September 20, 2012
Bowterrific Cookies Part 3!!!
As I have said before I am stubborn! I have decided to embrace this "I will not let a little sugar cookie beat me" project and instead went on a cookie cutter buying spree and ended up searching and stalking until I got these cute bow tie and neck tie cookie cutters (big and minis). This time I decided to use Pink Martinis and Pearls Royal Icing recipe; she also makes the most beautiful cake pops.
I ended up doubling her recipe and then making another batch. So the recipe below is enough for maybe 1/2 batch of my sugar cookie recipe. I think this might be my recipe because it worked out really well and wasn't sticky. I will have to try it out again just to make sure it wasn't a fluke!!! I thought some of it was coming out too thick so I thinned it well the thinner ones were the ones that weren't as dry, where the thicker dried better - totally not what I expected to happen! I ended up putting them in jars I bought for pretty cheap from Michaels for my dad and Uncles for Father's day. Also, do you see the cool gift tag cookie cutter I got! SO cute to tie it to the front of the jar.
ROYAL ICING:
(Source: Pink Maritinis and Pearls)
INGREDIENTS:
1 lb. Powdered Sugar (does not need to be sifted)
3 Tbl. Meringue Powder
6 Tbl. Hot Water (from tap is fine)
2 Tablespoon of Lemon Extract (this is an addition by me but do it to taste)
DIRECTIONS:
- With a whisk attachment beat all the ingredients on high until fluffy. Do not under beat. Pink Martini mixes for at least 8 minutes. Put the icing immediately in a container with a tight lid to prevent it from drying out.
I then followed her directions for 10 second icing:
10 SECOND ICING:
(Source: Pink Maritinis and Pearls)
- To get the nice smooth icing you see on the cookies it needs to be thinned. Too thin and it runs down the sides of the cookies and will not coat it well. Too thick and it will just sit there and not be smooth. (I find that this is trial and error for me and still learning)
- Add water a teaspoon at a time (sometimes I add some lemon just to keep the flavor up). Mix the water well.
Pink Martinis and Pearls says: Pull a dollop of icing on your spoon or spatula and let it drop back down; count to 10 and if it seems to melt and disappear by 10 then you have the perfect consistency. If there are still remanants add a touch of water. If it melts too quickly then you need to add more regular icing to give it more body. (I think last time I just put a little but more sugar in it).
Sweet Sugar Belle: makes 20 second icing. I LOVE her way of just drawing a line in your bowl and seeing if it disappears. Works well for the 10 second icing as well.
Honestly: I would love for my stuff to look even a quarter as good as Pink Martini and Sweet Sugar Belle and love their explanations, pictures, and directions. I really need to be better with my pictures and just not do them as I am running out the door!
Labels:
Cookies,
Decorating,
Holiday,
Icing,
Series,
Sugar Cookies
Wednesday, September 19, 2012
Sugar Cookies Summer Style!!! Part 2!!!!!
This is a continuining series in my adventures of trying to find a sugar cookie recipe!
Okay so cookies are my albatrose..........I am really good with cookies, pies, cupcakes but not with round cakes and sugar cookies! I am stubborn and have decided that I will get this skill so I can put it in my back pocket. This includes getting recipes I am really comfortable with. I decided to try something different then my normal icing recipe and to do a royal icing recipe. After looking (really stalking) a lot of wonderful blogs (seriously, there are so many talented (patient) sugar cookie people out there and I am just not one of them) I decided to try The Sweet Adventure's of Sugar Belle's Royal Icing Recipe. I liked this recipe but felt like it took forever to make, I do not have one of the awesome Kitchen Aid mixers. I also had trouble with getting it to dry really well but I blame that on the user and not the recipe; this is a reoccuring problem and why I started to look for a new recipe. It was a great way to kick off the summer!
I only made 1/2 of the recipe and it was enough for my cookies. I also used lemon juice (not extract) instead of vanilla so it definitely could have been user era. Also I know my cookies will never look good as hers!
O I used my new Sugar Cookie Recipe! Sorry the pictures are not the best - quick snaps with the iPhone.
Labels:
Cookies,
Decorating,
Entertaining,
Holiday,
Icing,
Series,
Sugar Cookies
Wednesday, June 20, 2012
Uh-Oh!!!?!?!? Sugar Cookies Part 1......
WARNING: LONG POST............OOPS! (but wait is anyway even reading this blog :) )
You know when you find the most perfect recipe, the one that you think will answer all your baking problems, the holy grail of baking? It is such a good feeling when it works out and you think okay maybe I can do these sugar cookie recipes and make them look as pretty as Sweet Sugar Belle or Bee in our Bonnet. So then you go to grab that recipe and you cannot find it!!?!?!? All of your sugar cookie dreams come crashing down! Then after some slightly psychotic searching, which you will never admit to anyone because it will clearly end with you on a psychiatrist's couch or a friend intervention (see How I Met Your Mother's intervention episode for some hilarity), you find it! Even with some questioning (hmmmm am I sure this is it) you try it out and it works woohoo. That is what happened to me with my sugar cookie recipe. I then wrote this blog entry feeling all superior and o wait........lost it again!!!! I only knew the recipe from the picture next to it and even though I didn't find the picture again I think we are back on track now! I am seriously a hot mess!
I have used various sugar cookie recipes and for some reason I have always had a hard time finding one that works well with molds and tastes good. When I made sugar cookies for my coworker's baby shower I thought I had it but while they tasted awesome they did not stay in their shape in the oven. So then I made a new sugar cookie recipe for my friend's shower and it worked out well but then alas it went MIA. I like this recipe and it is easy to work with, even when you cut the recipe in a 1/4 so I am going to stick with it!
After reading some blogs I realized that I could make a lot of cookies and freeze them to decorate for later and this made it a lot easier when I decided to make these adorable ring cookies for a girls nite/bachellerotte get together and then for a jewelry party. One of the blogs that I read (I can't remember which one!!!)mentioned that it easier to roll and cut the dough on the slip pat sheets that go in the oven so you don't have to worry about ruining the design. This cookie cutter does not have the center cut out and while I made a few with the center left in (which is a great idea if you want to put someone's initial) I liked them best looking like a ring; so I used a circle piece of one my cake writing sets but if you had a round cookie cutter that would work well too. Once the center is cut it is harder to move them so I totally suggest just rolling and cutting it on your slip pat or wax paper, really a life saver so thank you to whoever you are!
I learned a lot in decorating these cookies between the first and second time. I used my previous icing recipe, which is delicious if you add the lemon juice and easy if you don't have meringue powder around (maybe not perfect in the setting process but it works)! When I needed to thin it I used lemon juice and a little bit more mix. I discovered that Tip #21 was perfect for doing one big circle on the band, I also piped the top of the ring and then flooded it and threw some fun sprinkles and sparkles on them.
With the left over dough I made some mini cookies, hearts and shoes, that were also a big hit.
While these are not perfect and I have a long way to go I felt like this was a good start! More adventures in sugar cookies to come.........
THE BEST ROLLED SUGAR COOKIES:
(Source: All Recipes)
INGREDIENTS:
1 1/2 cups butter, softened
2 cups white sugar
4 eggs
1 teaspoon vanilla extract
5 cups all-purpose flour
2 teaspoons baking powder
1 teaspoon salt
DIRECTIONS:
- In a large bowl, cream together butter and sugar until smooth. Beat in eggs and vanilla. Stir in the flour, baking powder, and salt. Cover, and chill dough for at least one hour (or overnight).
- Preheat oven to 400 degrees F (200 degrees C). Roll out dough on floured surface 1/4 to 1/2 inch thick. Cut into shapes with any cookie cutter. Place cookies 1 inch apart on ungreased cookie sheets.
- Bake 6 to 8 minutes in preheated oven. Cool completely.
ICING:
(Source: Sheila's Cookies)
INGREDIENTS:
3 cups confectioners' sugar
1/4 cup margarine, softened
1 1/2 teaspoons lemon juice
3 tablespoons milk
DIRECTIONS:
- To make frosting, combine the 3 cups confectioners' sugar, 1/4 cup margarine and 1 1/2 teaspoons lemon juice in a medium bowl. Mix until smooth, adding milk 1 tablespoon at a time until frosting has reached its desired consistency.
Labels:
Cookies,
Decorating,
Entertaining,
Icing,
Series,
Sugar Cookies
Tuesday, June 19, 2012
Beating the Heat!
Okay I have written this post twice (once last year and once again this year) but I have never posted it because BOTH times I forgot to take pictures!!!!! I am not a cook, I just don't like it and I am a vegetarian. However, even knowing this Las year I decided to throw a BBQ Memorial Day weekend on my small patio. I made enough food for a small country, seriously it was ridiculous. I don't think 1/4 of the food was eaten. However, one thing that went like hot cakes was my Homemade Chocolate Chip Cookie Ice Cream Sandwiches. I am not sure if they went so quickly because it was ridiculously hot, I just love that DC is in a swamp, or because my air conditioning decided to break, or maybe it was because they were that delicious. I actually had some left over and they stayed very well in the freezer. I just made my Chocolate Chip Cookies (with minature chocolate chips) and after they cooled put some (melted because it was 1001 degrees inside my apartment) Mint Chocolate Chip Ice Cream and froze them over nite. Even after the BBQ was over I still had a lot left but they were good for the rest of the week and a great treat just to grab out of the freezer!!
O a little tip I learned from this food extravaganza: the deep, disposable lasagna containers are awesome for cooking a ton of marinated veggies on the grill. This way I didn't have to sit there and skewer for hours!
So no picture but just imagine these cookies with an ice cream scoop size of ice cream in the middle!
Labels:
Chips,
Cookies,
Entertaining,
Ice Cream,
Random
Tuesday, May 22, 2012
Happy Belated Cinco de Mayo Cookie Style
Happy Belated Cinco De Mayo!!! I actually attended a Quatro de Mayo party and wanted to make something festive so I made my Margarita Cupcakes with Lime Cream Cheese frosting; the party was on Friday nite but I brought them into work via the metro and kept them in our fridge during the day until my friend's husband came to pick them up during the day. My friend who was throwing the party was doing it to celebrate her husband's half Mexican heritage and her love for margaritas. I asked her if her husband felt Chocolate Mexican Wedding Cookies would be sacrarelig and thankuflly she said no because these came out so good and are so easy to make. The directions say to wrap the dough and let it harden for an hour but in true fashion I didn't buy enough pecans so made it in the night before and then came home for work took the dough out to let it soften for awhile and added the pecans mixed it and just went from there. They are sooooooo good and will be definitely be made again.
O if you buy one German Chocolate Bar then you will be fine! I used the blender to grate it but just remember that the blades can melt it so either do sections or just do it quickly (you can also freeze the bar if you want to).
Happy Cinco De Mayo! Now go pour yourself a Margarita!
Yet again I am a bad blogger and forgot to take a picture until I was at work so it was taken while they were in the box with my iPhone.
CHOCOLATE MEXICAN WEDDING COOKIES
(Source: Allrecipes)
INGREDIENTS:
1 cup butter, softened
1/3 cup confectioners' sugar
2 teaspoons vanilla extract
1 3/4 cups all-purpose flour
1 cup ground pecans (I just threw them into the blender)
1/2 cup German sweet chocolate, grated (I just threw it into the blender)
3/4 teaspoon ground cinnamon1 pinch salt
1/2 cup confectioners' sugar
1/4 cup German sweet chocolate, grated
DIRECTIONS:
- In a large bowl, cream the butter and 1/3 cup confectioner's sugar until light and fluffy. Add the vanilla extract.
- In a separate bowl, combine the flour, ground pecans, 1/2 cup ground chocolate, cinnamon and salt; mix well.
- Gradually add the dry ingredients to the creamed mixture.
- Wrap dough in plastic wrap and chill 1 to 2 hours, or until firm.
- Preheat oven to 325 degrees F (180 degrees C).
- Shape the dough into 1-inch balls. Place balls 1 inch apart on an ungreased baking sheet. Bake 15 to 18 minutes, or until the cookies are firm to the touch. Cool 1 minute on the baking sheet, then transfer to a wire rack.
- For the coating, sift 1/2 cup of the confectioner's sugar and 1/4 cup of the ground cocoa into a shallow bowl. While cookies are still warm, roll them in the coating.
Labels:
Chocolate,
Cookies,
Entertaining,
Margarita,
Nut
Saturday, May 19, 2012
Giganticness Part II
Here is another Gigantic Red Velvet cupcake! This was for my other neighbor, I really do have the best neighbors. The only problem with this one was that I got stuck talking to these awesome neighbors in the hallway and forgot that the cake was in the oven! I could have kicked myself because I was trying to be a perfectionist watching it bake but I still think it came out great.
Also, I could not remember how much frosting I needed for this cake; I usually squirt some into the bottom part and then use it to seal the two halves together. I started making double the frosting recipe and ran out of ingredients so I got up early the next morning to run to the store only to learn that I really needed 1 - 1 1/2 of the cream cheese frosting recipe. For the amount I bake I definitely should know these things! Now I do for the future :)
Labels:
Cream Cheese,
Entertaining,
Frosting,
gigantic cupcake,
Red Velvet
Friday, May 18, 2012
Devilishly Filled Peanut Butter Cupcakes
For my co-worker's birthday my devils food cupcakes with peanut butter frosting was a no brainer because that is his favorite but I wanted to do something different this time. After my recent success with filled cupcakes I decided to insert some forsting into the bottom of the cupcake. I know that there are now those fancy cupcake core removers out there but I just took a tube of the frosting a #tip and just stuck it right into the cupcake and filled it until a little came out of the top; I then scraped off all the extra. These came out amazing. My coworkers have had this recipe many times before but the reviews I got on this particular cupcake was astonishing. I actually never eat the cupcakes (I am a batter and frosting girl) but I had to go get one after lunch just to see if they were better and WOW that is some peanut butter heaven.
I originally just made 1 1/2 of the frosting recipe but needed some more for the last few cupcakes so I would say double it (which actually Is what the original recipe called for). These also came out so much cuter than the first time I made them, I am finally trying to get the look to match the taste!
Though previously listed on this site, I figured I would list the recipe again with the correct amount of frosting for filled cupcakes.
PS Sorry for the iPhone cupcakes at my desk, I always forget to take pictures until the last minute!
DEVIL'S FOOD CAKE RECIPE
(Source: allrecipes.com)
INGREDIENTS
1 1/2 cups water
2 cups sugar
3/4 cup butter or margarine
2 eggs, lightly beaten
1 teaspoon vanilla extract
2 cups all-purpose flour
1/2 cup baking cocoa
2 teaspoons baking soda
1/2 teaspoon salt
DIRECTIONS:
Preheat the oven to 350 degrees.
- In a large saucepan, bring water to a boil. Remove from the heat.
- Stir in sugar and butter until butter is melted.
- Add eggs and vanilla; mix well.
- Combine flour, cocoa, baking soda and salt; add to butter mixture and mix thoroughly.
Pour into cupcake pan and bake for 13-15 minutes, it makes 15-20 cupcakes.
PEANUT BUTTER FROSTING
(Modified from: The Peanut Butter & Co. Cookbook)
INGREDIENTS:
1 1/4 C. (2 1/2 Sticks) Unsalted Butter, softened
1/4 C. Smooth Peanut Butter (I use the same amount for half the recipe so you can use a little more)
5 C. Confectioners' Sugar
1/2 tspn. Salt
1/4 C. plus 1 T. Milk
DIRECTIONS:
- In a large mixing bowl, use an electric mixer to whip the butter and peanut butter together.
- Add the confectioners' sugar, salt, and then milk.
- Add additional tablespoons of milk or sugar to loosen or tighten the icing, respectively.
- For best results, use immediately.
NOTES:
- If the Devils Food batter looks thin - don't worry it is!!!
- The icing makes 4 cups, the halved recipes makes enough for one batch of cupcakes but use a whole batch for filled cupcakes.
- I added extra peanut butter, especially when halved, it is not an overly peanut buttery flavored frosting but it is definitely creamy.
Labels:
Cupcakes,
Devils Food,
Filled,
Frosting,
Peanut/Almond Butter
Friday, April 6, 2012
Birthday Giganticness!
Last Saturday was a busy baking day! At the same time that I was making my KU Cake I was also making another giagantic cupcake. This time I made a gigantic red velvet cupcake and injected some cream cheese frosting into the middle of it and used cream cheese as glue to put the top and the bottom together. I split purple cream cheese frosting into 2 batches and added pink to the second batch. I put the purple frosting into the bag first and then added the pinkish frosting so they would swirl together; unfortunately, my apartment was super hot and it was not sitting right on the cupcake (I was going top down) so I took it all off and started again but this time bottom up and then went back and went around the gap from the top to the bottom. I was also usper excited to use my new purple sprinkles.
This cupcake looks so cute and my neighbor loved her birthday cupcake! She actually brought it to a friend's house where they were watching the basketball games and she said that the little 2 year old's eyes grew so big when he saw the cupcake and also asked where the rest of it was going when she left with it (after leaving him some for the next day).
One tip I recommend with using this pan is to fill the bottom and cook it for 10 minutes; I also, haven't used this pan in a really long time so I kept checking it and adding 6 minutes over and over again so just make sure you keep your eyes on this one.
Labels:
Cream Cheese,
Cupcakes,
Entertaining,
Frosting,
gigantic cupcake,
Red Velvet
Tuesday, April 3, 2012
Chocolate Surprise!!
I have learned from previous cupcakes that people tend to love cupcakes with a little surprise in them and this cupcake is no different. This cupcake got rave reviews and I was told that even nonchocolate lovers loved them. The directions said to fill it with batter and then put in the filling but some reviewers suggested filling them a 1/3 of the way and then put the filling it and then another 1/3. I did that and used my trusty ice cream scoop and filled them 2/3 (about 1 scoop) and then filling and then another scoop. They do rise a little bit and my sunk in a little bit but once you glaze it nobody can tell the difference. Put this in the winner category.
CHOCOLATE SURPRISE CUPCAKES
(Source: Allrecipes)
Ingredients
3 cups all-purpose flour
2 cups white sugar
1/2 cup unsweetened cocoa powder
1 teaspoon salt
2 teaspoons baking soda
2/3 cup vegetable oil
2 cups water
2 tablespoons vinegar
2 teaspoons vanilla extract
1 (8 ounce) package cream cheese, softened
1 egg
1/2 cup white sugar
1/4 teaspoon salt
1 cup semisweet chocolate chips
1.Preheat oven to 350 degrees F (175 degrees C). Line 24 muffin cups with paper liners.
2.In a large bowl, mix together flour, 2 cups sugar, cocoa, 1 teaspoon salt and baking soda. Stir in oil, water, vinegar and vanilla until blended. Pour mixture into prepared muffin cups, filling each 2/3 full.
3.To make the filling: In a medium bowl, beat together the cream cheese, egg, 1/2 cup sugar and 1/4 teaspoon salt until light and fluffy. Stir in chocolate chips. Drop a heaping teaspoonful of the cream cheese mixture into each cupcake. Bake in the preheated oven for 25 minutes. Allow to cool.
SATINY CHOCOLATE GLAZE
INGREDIENTS:
3/4 C. semisweet chocolate chips
3 T. butter
1 T. light corn syrup
1/4 tspn. vanilla extract
There are two different ways to do the glaze - the official directions are first then my short cut ones are second
OFFICIAL DIRECTIONS:
- In a double boiler over hot, but not boiling water, combine chocolate chips, butter, and corn syrup. Stir until chips are melted and mixture is smooth, then add vanilla.
- Spread warm glaze over top of cake, letting it drizzle down the sides.
MY DIRECTIONS:
- In a microwave safe bowl melt chocolate chips and butter, occasionally stirring.
- After melted add corn syrup and vanilla.
- Spread warm glaze over top of cake, depending on the thickness either drizzle it or just spread it over the top and down the sides.
Labels:
Chips,
Chocolate,
Chocolate Glaze,
Cream Cheese,
Cupcakes,
Filled
Sunday, April 1, 2012
March Madness!!!
One of my very good friends is an alumnae and big fan of KU basektball! So when we all got together to watch them play (and win!) their semifinal game on Saturday I made a red velvet double layer round cake. It has been awhile since I have made a good ol' fashined round cake and let me tell you it showed! it got stuck in the pan and then I tried to put it back together with some glue (aka cream cheese frosting). While it was slanted it still tasted good! I really need to work on the basic cake! Good Luck to KU on Monday!
To do the KU and the design I changed a recipe recipe and it worked out well! I halved the recipe below:
DECORATIVE FROSTING
(Me modified from: allrecipes)
INGREDIENTS:
1 cup butter
4 cups confectioners' sugar
4 tablespoons milk
1 1/2 teaspoons vanilla extract
DIRECTIONS:
- Combine all ingredients in a mixing bowl. Beat on low speed of electric mixer until well blended and very smooth.
Labels:
Cake,
Cream Cheese,
Decorating,
Entertaining,
Frosting,
Red Velvet
Saturday, March 17, 2012
Happy St. Patty's Day!!!!
My guinea pigs, er co-workers, are used to getting regular cookies or cupcakes at work but after being inspired by so many talented blogs I decided to work on decorative sugar cookies. Who knew my biggest hurdle would be finding a St. Patty's day cookie cutter!?!?! Seriously Michaels! Thankfully my cousin had one that I was able to use. I also decided that there was no reason that I had to make a full batch, which is like 60 cookies, for work so I scaled my recipe back to 1/4 and it ended up making about 20 shamrocks, perfect! (recipe is in next post!) Still learning about decorating, people make it look so easy but it isn't!
Friday, March 9, 2012
Cheers with a Cupcake!
Of course as soon as I came up with the idea of a margarita night I started thinking about what I could bake; seriously I don't think I could have done any better since this had not only the cute factor but the delicious tasting factor. It was a huge hit. A lot of the margarita cupcake recipes I saw used tequilla either in them, glazed on top, or in the cream cheese and I really wanted one that did not have any tequilla in it because I knew we were going to have enough delicious margaritas and one of the girls who came was pregnant.
I made cupcakes out of this recipe and it came out to be 12 normal size cupcakes and about 8 minis (I do not use wrappers for the minis). O I messed up and forgot to add the lime juice to the cupcakes so at the last minute before they went into the oveN I sprinkled it into each muffin tin and then mixed it. The recipe below had a cream cheese recipe with it but not everyone seemed to love it and I knew I had an amazing cream cheese frosting recipe so I altered it to be a lime cream cheese frosting. I used the bottled lime juice because I am lazy. I ended up putting a lot of frosting on these (which everyone loved) and then sprinkled green sprinkles on top to look like green salt. I also cut straws down to size and used part of it to be a straight straw and then the bendy part too ( I had to cut both sides). I also bought some of the lime fruit salad slices and cut them in half for the big cupcakes and in thirds for the minis.
So happy with the way these came out. People took some cute pictures like they were drinking out of the straws :)
MARGARITA CAKE
(Source:Allrecipes)
INGREDIENTS
1 (18.25 ounce) package white cake mix (I used a golden butter recipe cake mix)
3 egg whites
1 (10 fluid ounce) can frozen margarita mix (such as Bacardi®), thawed
2 tablespoons vegetable oil
1 tablespoon grated lime peel
1 tablespoon lime juice
DIRECTIONS:
- Preheat oven to 350 degrees F (175 degrees C). Grease and flour a 9x13-inch cake pan or a cupcake tin.
- In a large mixing bowl, beat together the cake mix, egg whites, frozen margarita mix, vegetable oil, lime zest, and 1 tablespoon lime juice. Pour the batter into the prepared pan.
- Bake in the preheated oven until a toothpick inserted into the center shows moist crumbs, 30 to 35 minutes. If you do cupcakes about 15-20 minutes. Cake will be very moist. Cool in the pan.
LIME CREAM CHEESE FROSTING
(Source: Alexis)
INGREDIENTS:
1/2c. of unsalted butter (softened)
2- 8oz. packs of cream cheese (softened)
3 1/2 cups of powdered sugar
1 tbsp of Lime Juice (might need an extra 1 to 2 tablespoons based upon on thickness and flavor)
1/2 of a lime grated
Directions:
- Cream the butter and cream cheese together and then add the powdered sugar, lime, and lime peel. If you need to make it thinner use some more lime juice - I think I used an additional tablespoon but of course didn't write it down!
Thursday, March 1, 2012
Easy and Delicious Guacamole
As I have said before I like to bake but not to cook so of course when I started planning margarita nite I planned the drinks and the dessert but did not think of food. The day before having everyone I was talking to my coworker and said that I couldn't decide if I was going to buy guacomole or make it fresh. Her husband is Mexican and in turn has become an excellent Mexican cook so she said that it was sooooooooooooo easy that I had to make it myself.
Even though I had no idea how to peel an avocado (I tried to use a peeler and then ended up just tearing the skin off but later she said the easiest thing to do is cut it in half and take the pit out and then scoop out the insides) and no idea how to actually cut and mash an avocado it came out delicious! (I think I might be really picky about guacamole because I either love it and that's rare or hate it because it reminds me of a face mask but this one is a love). She said I could use a potato masher to mash it up but if it is not a baking tool I do not have it, so I ended up cutting it a little bit and then acting like I was a 4 year old and using my hands to mash it, I left part of it chunky.
Also, the originally recipe was for 4 servings but I ended up doubling it but instead of using 4 tomatoes I used 3 and not quite 1 cup of onions. Everyone kept raving about it and the 5 of us destroyed it! (I bought regular tostitos and the whole wheat scoop ones.)
From searching the internet I learned a little trick that is helpful and impressive once your friends hear about it; take an avocado pit and stick it in the middle of the guacamole until it is time to serve it, it will help it from turning brown.
I apologize for the bad iPhone photo!
GUACAMOLE
(Source:allrecipes)
INGREDIENTS
3 avocados - peeled, pitted, and mashed
1 lime, juiced (I used 1 Tablespoon of bottled lime juice)
1 teaspoon salt
1/2 cup diced onion
3 tablespoons chopped fresh cilantro
2 roma (plum) tomatoes, diced
1 teaspoon minced garlic
1 pinch ground cayenne pepper (optional)
DIRECTIONS
- In a medium bowl, mash together the avocados, lime juice, and salt. Mix in onion, cilantro, tomatoes, and garlic. Stir in cayenne pepper. Refrigerate 1 hour for best flavor, or serve immediately.
Labels:
Entertaining,
Margarita,
Random
Wednesday, February 29, 2012
Bucket of Deliciousness!!!!!
I decided to host a margarita girls night in the honor of my neighbor who was getting married. Well things didn't go as planned and instead of having 10 or so girls we had enough food to feed that many and had like 4 of us. o well more food for the rest of us! A few years ago I hosted a margarita night and I just remember spending most of my night in my kitchen making margaritas so I wanted a recipe that was easy and delicious and that is when I stumbled upon the Bucket of Margaritas recipe. This is a DEFNITE winner and keeper. I made 2 batches at once and kept it in a big plastic jug but some other people suggested making it and storing it plastic baggies. I took it out about 25 minutes before people got there and it took awhile to defrost but it was slushy and delicious (and a little strong). This is definitely a recipe worth keeping because not only is it delicioud but you can enjoy your guests too.
The second recipe I ended up using primarily as non-alcholic margaritas, one of the girls is pregnant so why should she miss out, and I made it with about a can and half of water. However, after she left I poured the rest of it into our glasses and added the Tequilla and Cointreau into the glass. One of the girls mixed the two and said it was delicious.
Bucket of Margaritas
(Source: allrecipes)
INGREDIENTS
4 1/2 cups water
1 1/2 cups tequila
1 (12 fluid ounce) can frozen limeade
1/2 cup triple sec (orange-flavored liqueur)
1 whole lime, cut into 6 wedges
DIRECTIONS
- Mix the water, tequila, limeade, and orange liqueur in a freezer-proof container with a lid; stir.
-Cover and store in freezer until it reaches a slush-like consistency, about 24 hours. Serve in glasses garnished with lime wedges.
STRAWBERRY MARGARITAS
(Source: allrecipes)
INGREDIENTS
1 (10 ounce) package frozen strawberries
1 (6 ounce) can frozen pink lemonade concentrate
1 cup tequila
1/4 cup triple sec
ice cubes (I actually didn't use any because I kept it pretty thick).
DIRECTIONS
- Place strawberries, lemonade concentrate, tequila, and triple sec in a blender. Blend until smooth. Add ice cubes as needed.
Labels:
Entertaining,
Margarita,
Random
Sunday, February 26, 2012
Minty Deliciousness!
Since I am so far behind let's talk about Christmas...............in February! For the past few Christmases I have made boxes of cookies for neighbors and our priest at Church. For the past few years I have been using the same basic cookies and then usually added one new recipe to the box. This year I was craving some chocolate and mint (for some reason mint means the holidays to me!)
Aunt Nettie's Cookies
Thumbprint Cookies
SOFT MINT CHOCOLATE COOKIES
Source: all recipes)
INGREDIENTS:
1/2 cup butter (no substitutes)
3 (1 ounce) squares unsweetened chocolate
1/2 cup sugar
1/2 cup packed brown sugar
1 egg
1/4 cup buttermilk
1 teaspoon peppermint extract
1 3/4 cups all-purpose flour
1/2 teaspoon baking powder
1/4 teaspoon baking soda
1/4 teaspoon salt
DIRECTIONS:
- In a microwave or heavy saucepan, melt butter and chocolate; stir until smooth. In a mixing bowl, beat sugars and egg; add buttermilk and peppermint extract. Beat in chocolate mixture. Combine the flour, baking powder, baking soda and salt; gradually add to sugar mixture. Let stand for 15 minutes or until dough becomes firmer.
- Drop by tablespoonfuls 3 in. apart onto ungreased baking sheets. Bake at 350 degrees F for 8-10 minutes or until edges are firm. Cool for 2 minutes before removing from pans to wire racks.
Subscribe to:
Posts (Atom)